On frozen water – the making of
Many of you have been asking to see the original shot before editing or the sequence of processing steps that brought to the posted image, and here it is.
1 – The raw shot

This is the starting shot, it was taken around 1 pm during lunch break on a cold day after snowfall, the weather was cloudy with some sunlight piercing the clouds.
There were seagulls flying on the Naviglio channel in Milano, so to capture them in flight, instead of shooting with HDR Pro app which is quite slow since it does take two shots to create the HDR effect, I used another shooting app called 6×6. Throughout the shooting session I used an Olloclip wide lens, as can be easily seen by the curved line of the river bank.
Amongst the shots I took I chose this one because the flying seagull can be clearly seen and has a nice vignette of snow around.
2 – Cropping and basic tuning
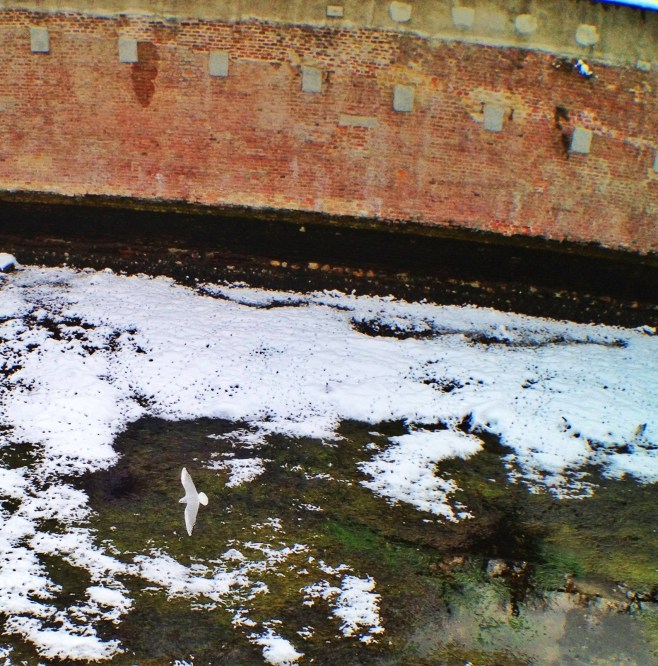
I used Snapseed to crop the image so that the subject (the seagull) was larger and better positioned.
After that I tuned contrast, brightness and saturation.
3 – Dynamic Light
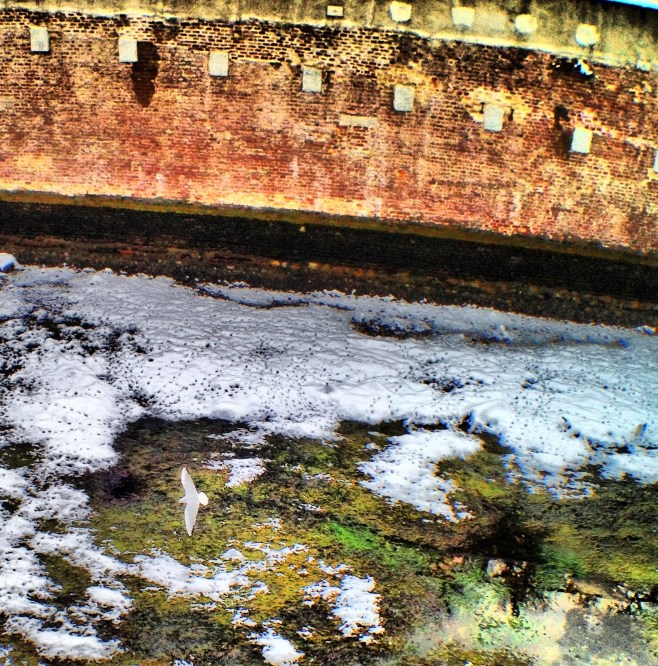
To enhance and dramatize the image I used Dynamic Light, an app that applies many effects but mainly does a HDR-like effect.
4 – PicGrunger
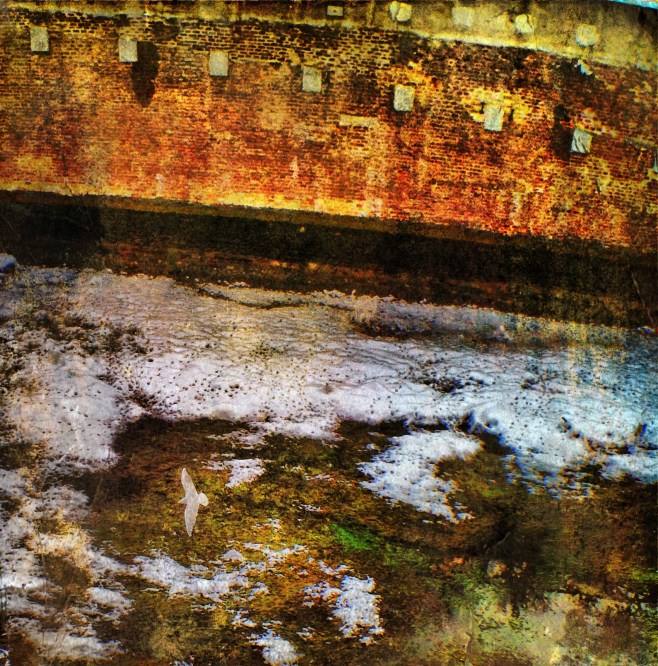
PicGrunger applies textures to the image in the so-called “grunge” style. I chose warm textures for this image.
5 – Phototoaster
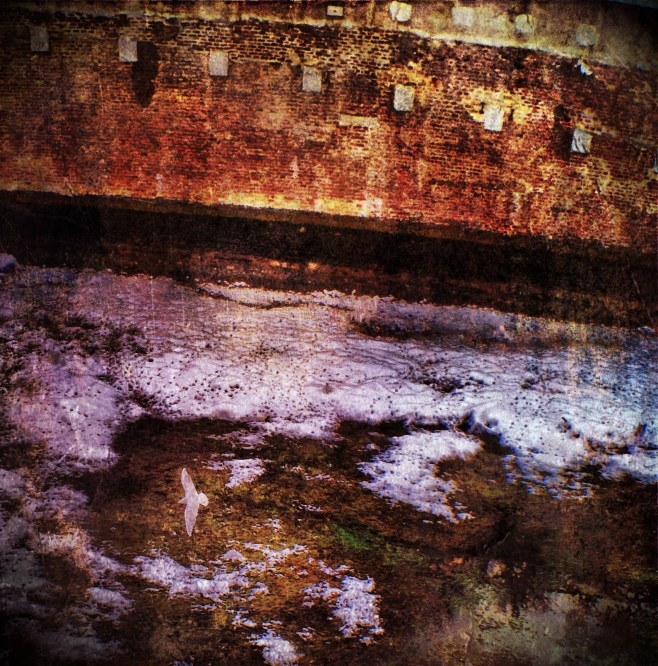
Phototoaster is a all-round editor that I find very good for final balancing and refining of the image. In this case I mainly corrected the color temperature of the image adding blue and red hues.
In many images my editing chain stops here, and the final image is ready.
Looking at the image, however, you will notice that after all this editing the seagull is almost lost in the image and does not catch the eye of the viewer.
There are different devices you can use to make a subject pop up in an image, for this shot I chose to enhance the image with an app called Rays.
6 – Rays

Rays enables you to add light rays effects to an image. In this case I chose to originate rays from the subject, the seagull.
Rays has however the downside of generating a misty overlay that reduces contrast and colors making the image somewhat dull.
7 – Final image – On frozen waters
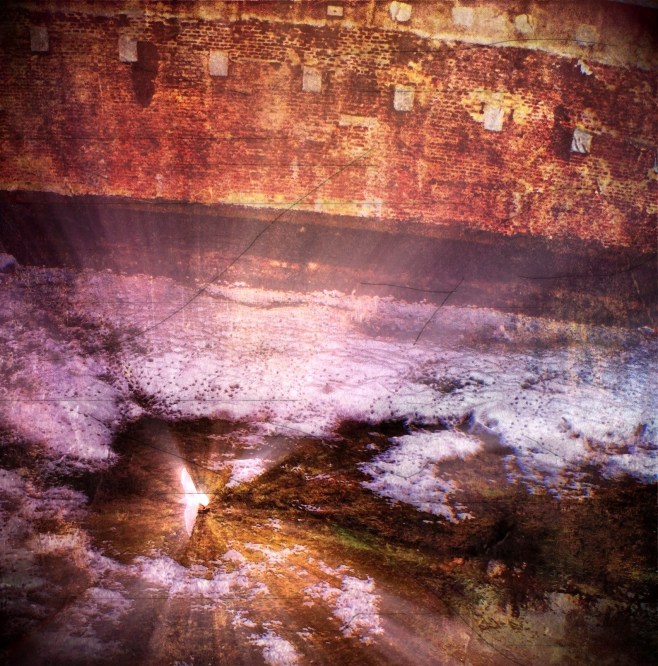
To give back “punch“to the image I did some final adjustments to contrast, brightness and saturation with Snapseed.
And this brings us to the final image that you have seen in the previous post.
Hope you enjoyed this walkthrough, it was nice to go back with you at the steps I followed to create this image.
27 Responses to “On frozen water – the making of”
Thank you Davide. I too added a final “tune up” in Snapseed after editing in several other apps. Without that last step I find that the digital image processing in and out of separate apps tends to produce a “muddy” end product (underexposed, de-saturated etc.) My phone/tablet editing workflow is very different from traditional PC Lightroom & Photoshop techniques where we “stay inside” Adobe Creative suite without saving & re-loading many times. Shooting RAW on a DSLR is also entirely different technically to using a smartphone camera.
The advantage of a pocket-sized camera (with a built-in mini-darkroom) in terms of freedom of mobility makes it worthwhile exploring, as your fine portfolio demonstrates so clearly.
Peter, shooting and editing on a smartphone is definitely different, and in my opinion it is not only a matter of editing software and techniques.
Mobile photography with the lo-fi implications due (at least initially) to simplified optics and electonics led to a different creative approach where the initial shot is raw starting material and much creativity takes place in postprocessing.
On the other hand, using a workflow with many discrete apps is for certain bad for the technical quality but good for allowing many more different editing combination in respect to the adobe Behemot packages on the PC.
Competition can be a good thing, let’s hope that ios/android stores will stay away from monopolies for a long time.
I still use my DSLR, but I don’t have half of the fun I have with my iPhone!
Davide
[…] I got home, I went to work the pictures I took with my iPhone. Using the techniques of rubicorno, I used several apps to tweak my […]
Thank you for walking us through the steps. I’m so used to photoshopping things but with my iphone I am such a novice. I have toaster and snapseed and am just beginning to play. I’m going to look at adding dynamic light. I appreciate your taking time to do this. I would love to buy your collapsed spiral stair photo.
Thanks to you, I’m glad you’re interested in my techniques! You can buy my Collapsed spiral staircase photo on Imagekind: http://www.imagekind.com/Collapsed-spiral-staircase-art?IMID=c45d5486-da2d-4dec-a899-224c818dc327
Davide
[…] Disponibile anche la versione in inglese. […]
Interesting . . . the original shot has a fish-eye look to it. Is the iPhone built-in camera capable of zoom? Or are the actual structures (railing and wall) actually curved?
Thanks for the run-through.
The iPhone camera has no zoom, so I use an additional clip-on lens called Olloclip, that adds wide, fisheye and macro lens.
You are inspiring me to try more…thank you for sharing your art 🙂
Thanks for that process sequence! Love the original and the finished photo! Thanks for liking my art also.
Great behind-the-scenes post! I think by sharing what goes into our art we broaden its appreciation and hopefully inspire others to go forth with their own creations. I tweeted this link as a great example for others. Molto bene!
Thanks Richard, it was actually fun to put down in an organized way what I usually do in a totally instinctive stream by trial and error!
See you on IPA, congrats for your feature!
Davide
The original shot is wonderful with the gull framed so beautifully. Then you made it into art. Thank you for taking us through the process.
I agree with nikmimms. A tutorial would be great for people who are interested in creating this kind of image. However, that would be comparable to handing a high-end camera to a five-year old and expecting him to produce the same image you produce. I don’t imagine it’s going to happen, Davide. Your work is really beautiful. I think it’s in your eye….
Fascinating! Thanks for describing your process! From the finished photo posted earlier, I had no idea that was snow! I thought it was clouds reflected from the ice. Really interesting!
Una spiegazione molto interessante. Grazie
Ciao, Patrizia
Very nice! It’s great to see the steps you went through from original to final. Thanks!
Thanks for sharing your process. It’s always great to see how people get to the end product on the photography.
Thanks for explaining in detail! I was wondering about it! Lovely processing too.
Davide,
I am a novice and unfamiliar with all of these apps you use on your images, but will certainly research them. This is quite an art form, and your work is so amazing!
Thank you for sharing—
Linda
Very interesting to see how an artist creates his work.
What you do seems like magic. Thank you for the tutorial. Your creations are always stunning!
So good and great that you share how you do things.
Davide, thank you so much for explaining your workflow. Very insightful.
AHH so that’s how you do it 🙂
Thank you for sharing this process with us. You have wonderful creations on your site.
I also enjoy taking photographs and seeing how electronic imaging can enhance them. What I have learned, is that this is an art in itself because it takes the artist’s eye to see and know which process will create the wanted outcome. When I play with Photoshop’s filters, I just put on one and then another, sometimes building layers as you did here, to see which one I like the best.
Well done!
Hi Davide,
Thanks for sharing this with us.. Very generous
Of You. Its interisting to see how you work
And understand the Way you process the images. You should put together a tuturiol for You Tube as there are very few videos on this subject.
Have a great Sunday
Nik